Make Money Blogging http://www.problogger.net рекомендовать друзьям >> |
- Boost Your Blog #3: Optimize Your Advertising Page
Continuing our discussion of things you could be doing right now to improve your blog, today’s tip is:
3. Optimize your advertising page
When I mentioned I was writing this post on Google+ (connect with me here), Nick Roshon suggested auditing your advertising page.
If monetization through selling advertising is part of your business model, then this one should be a task you build into your regular schedule of pages to update.
Keep your advertising page up to date with the latest options for advertisers to advertise, update your stats so that advertisers know what reach they’ll have, and make sure that this page is prominent on your blog so that they can find it.
Do you have an advertising page on your blog?
Originally at: Blog Tips at ProBlogger

Boost Your Blog #3: Optimize Your Advertising Page

Переслать - 9 New Productivity Tools to Simplify Your Online Life
This guest post is by Leo Widrich of Buffer.
After Google+ entered the social networking scene not so long ago, the number of online distractions hasn't really decreased.
At the same time, innovations and smarter solutions to handle your actions online have fortunately continued to thrive too. Instead of the usual to-do lists, news readers, or sharing tools, they tackle things in new and more helpful ways.
What's most important for me, is that they slot right into my workflow, and allow me to become more efficient without changing my behavior. A few apps recently managed to do so brilliantly.
Here are my favorite new tools to help you stay focused and use the Web more innovatively.
1. SimpleNote
Do you ever have that feeling of random thoughts and ideas floating around in your head, but there is no optimal solution to jot them down? With SimpleNote, I found a fantastic way to finally write down things in a very intuitive manner. The Chrome extension lets me write things down fast and easily. On top of this, it stores it very intelligently in folders, simply by adding tags.
Workflow tip: The app integrates with a lot of already existing apps to make note-taking inside them even easier.

SimpleNote
Try it out here: SimpleNote
2. Let's Crate
If you think the likes of Dropbox or Box are making filesharing easy already, you might be surprised as what Let's Crate can do. Without any signup or signin process, you can start adding your files right on the landing page. The service automatically generates a link that you can share, embed in blogpost, or send via email. It truly simplifies my online life.
Workflow tip: If you do decide to get an account with the app, you can easily turn it into your online storage system, add folders, and use it as a backup.

Let's Crate
Try it out here: Let's Crate
3. Coolendar
This is one of the smartest inventions I’ve seen recently. The app is actually a to-do list that automatically turns into a calendar based on the entries you make. It uses super-simple syntax to understand the time and creates a calendar as you type a new to-do item. So, say for example, you write "Tomorrow, 5pm, blogpost due for Mrs. White" and the app automatically detects it and creates an entry in your calendar as well as a to-do item.
Workflow tip: The best part here is that you can set up a bot inside Google Talk, which will remind you right inside Gmail whenever a task is due.

Coolendar
Try it out here: Coolendar
4. Mockflow
As a full time blogger, my skills in design and programming are very limited. Yet, being able to express myself clearly is more vital than ever. A better blog layout is a crucial component of blogging success these days. With Mockflow, you can create powerful wireframes that facilitate working with designers and programmers a great deal. There exist a wide range of tools and templates to make them look pretty, and are easy to implement.
Workflow tip: What I like best is that the app also works offline, so if you are wireframing on the go, you never have to worry about connectivity.

Mockflow
Try it out here: Mockflow
5. StrawberryJ.am
As a blogger, my main focus is to produce the best content I can write each day. Of course, keeping up with the great posts my favorite blogs write is vital here. Yet knowing what the really good bits are is sometimes tricky. Help comes from StrawberryJ.am. The app orders all the Tweets from your stream on the basis of most mentioned and retweeted. So at one glance, you will see the hot and most-discussed news items in your timeline.
Workflow tip: If you really don't want to open another site each day, simply subscribe to your own top news and the app will deliver updates straight to your inbox.

StrawberryJ.am
Try it out here: StrawberryJ.am
6. Do it Tomorrow
This is a piece of innovation I would never have thought could be useful. Yet Do It Tomorrow slots perfectly into my workflow. I am usually the kind of person that puts way to many to-do's on the list for one day. With this neat Android app, I create a simple to-do list of the things I need to get done and never worry about putting too much on my plate.
Workflow tip: By simply tapping on the little arrow, a to-do gets pushed onto the next day. You’ll never lose to-do's you didn't get to.

Do It Tomorrow
Try it out here: Do it Tomorrow
7. Oh Life
You will most likely know that the benefits of writing are plentiful. One of the most important factors for me is to order my thoughts. Oh Life takes a very new approach to making it easy for you to write down your thoughts about life. Every evening, the app will send you an email asking "How did your day go?" By hitting Reply, your entries will be safely stored as an online journal.
Workflow tip: Going through my personal Oh Life stories every once in a while helps me a great deal to focus and recap what I am working on.

OhLife
Try it out here: Oh Life
8. Rapportive
I found that one of the most important things when speaking to someone via email is to really understand what the person is all about. Rapportive is a Chrome extension that slots right into Gmail and gives you a new tab of information all related to the person you are speaking to. This includes recent tweets, information from Facebook, LinkedIn data, and much more. You can build a rapport with them immediately and fully understand what they are all about.
Workflow tip: Very recently, the app has added a functionality to allow you to reply to tweets right from inside Gmail. This facilitates interaction a lot, I’ve found.

Rapportive
Try it out here: Rapportive
9. Skinnyo
This is my extra tool for you, as, different from all the others, it focuses on your physical shape. For a healthy online workflow, the Latin saying of "Mens sana, in corpore sano" (healthy mind, healthy body) is something I follow very closely. The app allows you to enter into online challenges with others, keep track of your weight, and have fun staying in shape with others. You can create teams, challenge each other, or use it strictly for personal use to keep track of your exercise.
Workflow tip: I particularly like the Social Network behavior of Skinnyo. It makes it easy to see how others are doing and keeps me motivated.

Skinnyo
Try it out here: Skinnyo
These are my favorite tools to make the most of my day online. How about you? Do you think some of them could be useful for you too? Are there others you can add?
Originally at: Blog Tips at ProBlogger
9 New Productivity Tools to Simplify Your Online Life
Переслать - Monetizing Your Blog with a Clean Design, Tribal Headhunter Warriors, and Fine Art Nudes
This guest post is by Glen Allison of www.GlenAllison.com.
This is a case study outlining my three-step website development and the graphic design aspects of my blog monetization.
As a visual artist, when I finally decided to start monetizing my blog, one of my primary concerns was to maintain the clean graphic design of my website without the clutter of “in-your-face” advertisements screaming at the viewers, whom I didn’t want to overwhelm with my monetizing endeavors.
I’m a travel photographer and during the past couple of years I launched three related blogs: one for travel stories, another for fine art photos and one for lighting tutorials to describe my portable lighting setups for shooting unusual tribal characters in exotic, remote locales. Why three blogs? My goal was to build website traffic as fast as possible in an effort to increase my Google search rankings. My website has an embedded ecommerce feature using a Photoshelter platform to market my travel stock photos. High site traffic is crucial to these sales since I’m competing with the world’s largest stock photo agencies, several of which I’m also a contributor.
A Naga warrior
My three-step website development strategy for blogging, augmenting traffic, and monetizing is as follows.
Step one: redesign
My primary blog audience is other photographers, who are not going to be my main stock photo and fine art customers but these photographers will serve as a base to build readership that will augment my website page rank.
Initially I created three WordPress.com blogs but since they functioned as entities separate from my main website, the traffic they generated wasn’t aggregating toward the SEO of the main site I ultimately wanted to promote for stock photo licensing. My first step was to completely redesign my website by moving away from a Photoshelter readymade template into a design that incorporated the Photoshelter eCommerce and the three blogs into the site architecture in the background of my one primary website. By applying a few SEO strategies, my page rank rose from zero to one during the first year.
Step two: targeted social media
After wetting my feet and honing my skills with these three blogs my target shifted toward augmenting site traffic by using social media, primarily Twitter, where I created three separate but related accounts. Then I started following the followers of a few well-known photo pundits of portable location lighting since I decided to use my Stroborati lighting blog as the primary traffic driver to my website.
Photographers seeking lighting tutorials would be my targeted audience and I chose to follow the followers of top lighting photographers in the industry, who had more than fifty thousand Twitter followers themselves. At first I tried to do this manually and believe me it was the world’s worst nightmare. What a boring, time-eating task.
A couple of months ago I discovered TweetAdder and soon automated much of my Twitter activity. What a godsend this software has been. I programmed it to follow eight or nine hundred followers daily for each of my targeted groups, one for each of my three Tweeter accounts so I wouldn’t be following the same people with each account. Now I’m getting three or four hundred reciprocal followers daily. I’m not using an overly aggressive campaign so building up my own huge following will take several months.
I’m also a novelist and, yes, I blog well-written quality content with dramatic photos from my travels to keep the viewers coming back for more.
I set up TweetAdder to automatically send a thank you message to each person who followed me back and in this message I suggest they might be interested in seeing my Stroborati blog where I feature location lighting setups for fierce Naga headhunter tribal warriors and fine art nudes. I also include links to those blog pages. Naturally this message attracts curiosity. Just about everyone who follows me winds up hitting my site. Remember I’m following a highly targeted audience that is keen about lighting details. My unique, eye-catching photo subjects peak viewer interest since most lighting tutorials on the Internet cover rather mundane subjects by comparison .
I might add that if any new follower sends me a direct message with questions, praise or comments, then I immediately correspond with them one-on-one in an effort to create personal interaction. As a result, my time spent on social media endeavors has skyrocketed. I must also manually fill out the captcha info for all the TrueTwit validations.
In only two or three months, however, my page rank jumped from one to three. So the social media campaign was really paying off.
Step three: monetization
In retrospect I should have installed my site monetization prior to my blitz social media campaign, but better late than never. So I spent the last month signing up for affiliate relationships with Amazon and a couple of top online photo equipment dealers and several companies selling Photoshop third party plugins, products that would interest my targeted audience.
I also developed several of my own Photoshop action sets that I sell from the site as well. Before I knew it, I had a slew of monetizing links and immediately realized I had to minimize the clutter. As an image artist it’s extremely important to me that viewers have a stimulating visual experience when they visit my site.
I decided to include AdSense and have placed three discreet, 125x125px, ad blocks on each blog page: one at the top left corner of each blog post and one in the bottom left corner plus one in my sidebar. I chose a color theme for the ads that matched the design of my website and I only use text ads with small black text and with no blinking photos, which I find extremely distracting.
AdSense automatically selects ads in context with topics in the blog post and the selections are often amusing. For my fine art nude lighting tutorials from Bangkok, the AdSense bots frequently make surprising choices like, “Date Sexy Thai Women” or “Thai Girl Massage.” Oh, well, at least I’m getting lots of clicks for hot chicks.
For my Amazon links I initially used their default, somewhat garish colors for text and prices, which adds clutter. So I decided to mute this visual assault by toning down the text colors and deleting the price info altogether.
In the text of my lighting blogs I mention the photo gear I used for that particular setup. In the past I created links for this gear back to the manufactures’ sites so my viewers could learn more if they desired. Now I’ve changed all those links to have my affiliate code embedded. Also at the end of each blog post I added small, clickable photos of this gear (with no text but viewers can hover the images for info) and each is now linked to Amazon for my affiliate sales. Here’s a sample blog page.
Many of my viewers are interested in the awesome array of photo and lighting gear I travel with and the specific software I use to create my dramatic images. So I set up a “Gear Links” page and a “Software Links” page both with clickable sample photos of the items, each embedded with my Amazon affiliate code. And while I was at it, I created a “Glen’s Favorite Photo Books” page. You will see that eliminating the prices streamlines the page design with minimal eye flicker, especially with so many items to peruse. The links for these three product pages are listed near the top of my blog sidebar to make it easy for viewers to find them.
When I include fine art photos in my blog posts, the images are linked to RedBubble where viewers can purchase prints, calendars, greeting cards and posters. Another monetizing feature that’s not in your face.
And finally, in my blog sidebar I’ve included the small but intriguing cover photos of about a dozen great photo books by famous photographers. There are no prices showing and no text, just a cleanly designed column of exciting book covers to draw attention as the reader scrolls through my blog post. If they want more info about a specific book, they can hover over its cover photo.
Am I potentially reducing my click rate with these toned down design choices? Probably, but design is more important to me while still incorporating passive income opportunities. In the first month I sold fifteen books through Amazon with a conversion rate of approximately one in eighty clicks. My website is currently getting about 12,000 hits per month.
Augmented site traffic will surely increase my newfound passive income endeavors that don’t scream out at the viewer. I certainly don’t want to run people off with my overnight, blitz monetization campaign.
Glen Allison has embarked on his second marathon 10-year, nonstop vagabond odyssey across the globe to photograph extraordinary destinations. His images have been published more than 60,000 times in most of the world’s leading travel publications. Visit his website, www.GlenAllison.com and follow his escapades on Twitter.
Originally at: Blog Tips at ProBlogger
Monetizing Your Blog with a Clean Design, Tribal Headhunter Warriors, and Fine Art Nudes
Переслать - White-Hat SEO + Social Media = Link Bait Magic
This guest post is by Ben Jackson of SEODiscovery.org.
You're a blogger.
You want traffic.
You know between nothing and a lot about SEO?
Perfect.
Most people are intimidated by SEO and just as many have no clue what it's all about. This is exactly why corporations waste thousands upon thousands of dollars every year on useless SEO practices that produce lackluster results—they don't understand what is happening! Well here is my proposition:
Whether you already understand SEO or know nothing about it, I am going to present a strategy to you right now that will have you getting lots of links and traffic to your site, and here's the kicker…
You won't even realize you're building links! You can follow this process, concerning yourself only with creating great content and establishing a great reputation in your niche, and the links and rankings will follow.
Enough talk. Let's get to it!
One of the only SEO tactics that is actually considered to be white-hat is link bait. Link Bait is a piece of content or feature on a site that is especially appealing and worthy of attention. Visitors like what you've shared so much that they link back to you, thus "link bait". You do the work upfront creating something awesome and then sit back as the links pour in for you. This is also referred to as natural link building and is 100% white-hat.
Step 1. Create your link bait
We are just getting into the entire promotional/SEO campaign we're going to be developing and this is by far the most important part. You need to have something really great to share and you need to use the magic word—it needs to be FREE (always capitalize FREE). I'm sure we all know already that people love posts with lists: Top 10 Article Directories, Best 5 Tips for Weight Loss, and so on.
You want to create really usable and exciting content for your niche. Compile a few lists together into one comprehensive directory, create a list with an angle that hasn't been done, share a secret actionable tip you have been waiting to share—something that your viewers will want to come back to and share with others. You can get creative and provide value however you want (I did it with a free software program you can see here: FREE OnlyWire Account Creator).
Bonus tip: If you really want to kick it up a notch, think of something people never give away for free, and give it away for free. Software or an ebook without an opt-in can work well, and you can also put affiliate links and links back to your site in your product.
Step 2. Make sure it's shareable
The Internet and how we share online has changed a lot over the last few years. We don't get so many forwarded emails with jokes in them anymore (that is so 90's). These days, social media has become the analogy for word of mouth on the Web, and we want to let the people talk!
While we are creating "link" bait and we want to get links from webpages, we cannot ignore the fact that most people will opt for a tweet instead. Many people don't have a real online presence or won't write a relevant blog post in order to share your link, so they'll just tweet it or like it on facebook instead.
This is why it's very important that we place sharing buttons prominently on our page with our link bait and also refer people to them. Every tweet will expose your link bait page to more people who may also retweet or link to your page. Basically, you have an opportunity to greatly expand your popularity and potentially go viral off this process.
SEO reminder: getting a lot of links to this one page on your site will give it a lot more authority and this link juice will spread through your internal links and help other pages on you blog rank higher as well.
Step 3. Create the spark
Part I: Getting ready
At this point you've got your awesome link bait setup on your site, catered towards your niche, and ready to explode. The sad truth is that if you build it, they will not come: you still have to promote this page to get the ball rolling. If you have a big Twitter following or an email list, you can contact these people about it to get things started.
A lot of us don't have those assets built up yet, but thankfully there is a lot you can do to ignite the fire on your link bait. We are going to accomplish three different things all at the same time:
- Build dofollow backlinks to your site.
- Build links to your link bait.
- Establish/build a positive and professional reputation in your niche.
This is all done through blog comments. Here's how:
- Go to www.dropmylink.com.
- Enter a very broad keyword for your niche like "seo" or "cars".
- Choose to search for "KeywordLuv" blogs.
- Click Search.

Drop my link
This will help you find tons of blogs in your niche that use KeywordLuv on their comments. In case you're not familiar, KeywordLuv blogs are "dofollow" which means they pass link juice, they allow you to use your keyword to link back to your site, and a lot of the time they link back to your most recent post too. Your goal is to first amass a list of popular KeywordLuv blogs in your niche.
Part II: Here comes the magic
It's time to reveal how this all comes together now. You're going to visit each of these blogs one-by-one and leave a comment on their most recent blog post. You want to comment on the most recent blog post because it will have the most activity which means the most potential for people to click through your links and find your link bait.
Also, these pages are linked right off the homepage so they should have some PR (No you can't see the PR because "Toolbar PR" isn't updated often, but the page does have PR). When you comment, you can leave a link with anchor text to any page of your site you want to rank. I know you don't have all page #1 rankings, so choose a keyword you have been working on and leave an anchor text link to the corresponding page (there's the link building part).
When you leave a comment you will also automatically get a link to your most recent post. The idea is that you make your link bait your most recent post. This way, you get an anchor text link to a page you want to rank and you get a link promoting your link bait. These "most recent post" links stand-out and get clicked on more often as well.

Most recent post
When blog commenting, take the time to read the post (you might learn something from it) or at least skim it so you can leave a comment that adds value to the page. If you leave stupid comments like, "Wow, great share thanks!!" you will fail in two ways:
- Your comment won't get approved.
- You won't look authoritative and won't build a solid reputation in your niche.
Make a meaningful comment because this will cause discussion around your comment and it will make people want to click through your link. To recap, you will visit a popular blog in your niche with KeywordLuv enabled and leave a comment on their most recent blog post. You are not spamming, you are adding value to their page and sharing your links.
This way, you can establish yourself as an authority in you niche, build "dofollow" anchor text links to your website, and promote your link bait so that it catches on and gets links to your website on autopilot.
Bonus tip: When someone in your niche comments on your site, follow their link back to their site and comment on it too and even tweet a post of theirs. This goes a long way for building strong relationships and networking with relevant web masters.
SEO is becoming less and less about traditional link building, and spamming becomes a dumber idea every day. If you focus on sharing quality content, creating a great user experience, and integrating social media, you are bound to grow your traffic and increase your rankings. You can repeat the above strategy over and over again for repeat results. Instead of worrying about the newest link building schemes or paying for an expensive new SEO program, you can focus entirely on creating great content and building your reputation—every blogger's dream.
Master the SEO basics for FREE with Ben Jackson's SEO Course (No opt-in) and be sure to follow Ben on Twitter and "like" the FB page too!
Originally at: Blog Tips at ProBlogger
White-Hat SEO + Social Media = Link Bait Magic
Переслать - Boost Your Blog #2: Start an Email Newsletter
Continuing our discussion of things you could be doing right now to boost your blog, today’s tip is:
2. Start an email newsletter
This is another tactic that I know many bloggers are convinced of. But for one reason or another it’s seen as something they’ll do “one day”—maybe when they have more traffic, maybe when they have more time. The reality is that by starting an email list early on (and using it smartly), you’ll accelerate both the driving of traffic to your blog and the monetization of it.
Do you have an active email newsletter for your blog?
Originally at: Blog Tips at ProBlogger
Boost Your Blog #2: Start an Email Newsletter
Переслать - The Blogger's Guide to Online Marketing – 31 Steps to a Profitable Blog
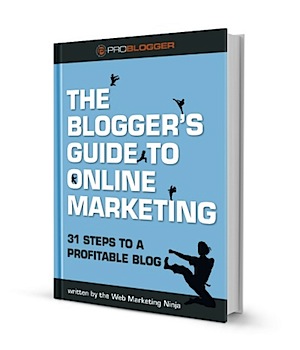 Today we’re launching a brand new ProBlogger Resource – something we’ve been working on for many months now – The Blogger’s Guide to Online Marketing – 31 Steps to a Profitable Blog.
It is a Kit that is all about helping you create an income that sustains your blog.
Created by the Web Marketing Ninja – a guy who has helped me with my own blogging business – it is his own blueprint for online profitability and it will give you an insight into the way that I now make money from my blogs.
The Ninja helped me make my first million dollars selling my own blog products here at ProBlogger, so you know you can trust his expert advice.
It's all you need to make your blog turn a profit now, and over the long term.
This essential guide retails for $99.99 USD, but for a limited time, you can secure your copy for just $49.99—that's 50% off!
The Strategies I Now Use to Monetize My Blogs
The Blogger's Guide to Online Marketing—31 Steps to Profitable Blogging has two parts:
1. The 31 Chapter eBook
This clear, practical ebook includes 31 chapters focused on practical profit-creation strategies:
- Conduct a brand audit
- Create customer personas
- Conduct the "three-second" test
- Create a framework for measuring success
- Get set to A/B test
- Master the campaign
- Manage a launch
- Price products
- Define your sales funnel
- Understand the long tail
- Know when to stop marketing
- …and plenty more. See the full chapter list here
2. The Comprehensive Resource Library
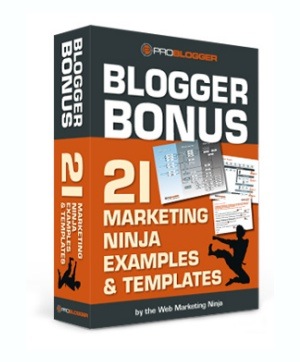 Your downloadable, practical resource library contains more than 21 templates and worksheets to help you put the Ninja's advice into practice immediately:
- Sample sales pages
- Measurement framework
- Campaign planning proforma
- Affiliate performance measurement tool
- Customer life-cycle analysis example
- Joint venture email template
- …and many more.
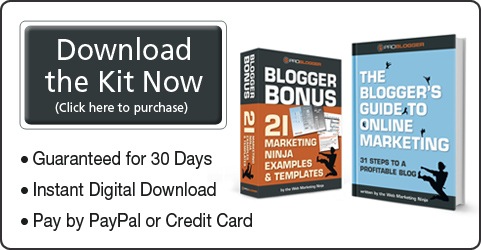
My 60-day money-back guarantee applies, as always, so there's no risk to you. If this product isn't what you expected, you can get a full refund.
Download your blueprint for blog profitability today. For more information on The Blogger's Guide to Online Marketing—31 Steps to Profitable Blogging, visit this information page or get your copy by clicking the button below.
Originally at: Blog Tips at ProBlogger
The Blogger’s Guide to Online Marketing – 31 Steps to a Profitable Blog
Переслать
 | Интернет-инструменты для малого бизнеса Практические приемы интернет-маркетинга. Saas-решения для малого бизнеса. Опыт малого бизнеса . Присоединиться → |
| rss2email.ru |
| rss2email.ru | отписаться: http://www.rss2email.ru/unsubscribe.asp?c=12354&u=1052515&r=672244627 управление подпиской: http://www.rss2email.ru/manage.asp партнерская программа: http://partner.rss2email.ru/?pid=1 |